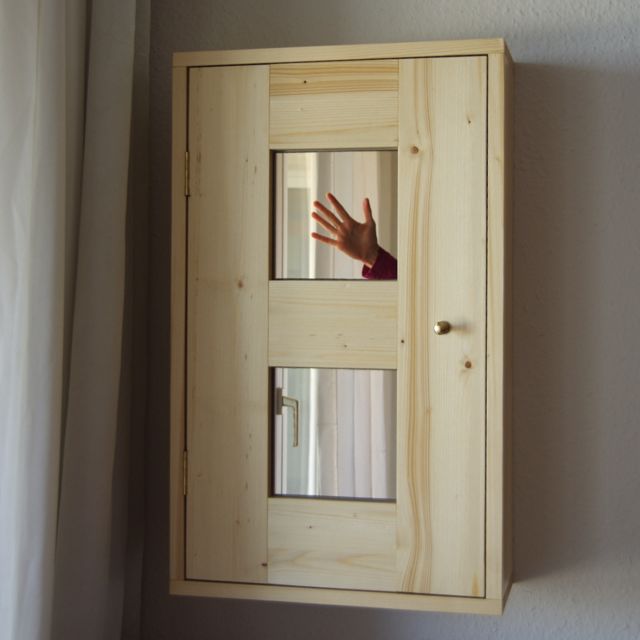

All the bling in one place!
I finished my first “real” woodworking project using pocket holes, and what shall I say – I love it. It was quite some work, took loads of planning beforehand, then the help of my beloved brother for the sawing (he is a woodworking pro – doing that with hand tools would have really gone over my abilities), then some rescue due to a planning mistake, then all the drilling, sanding, glueing, screwing and painting. But now it is done.
All the bling in one place…! It is a cosy home for my silver darlings, those already with me and those yet to come. Inspired by this cute cabinet, a new idea is growing in my head, concerning my next project in the silversmith’s workshop: I am going to make an owl pendant. But that is the future, and this baby is the present.
Actually, the easter present for myself 🙂
I used 18 mm spruce, constructed the framed door first (using pocket hole joinery). The backside of the door is paneled with plywood, hence I could glue two mirror tiles into the door frame openings. The plywood also covers the pocket holes of the door frame.
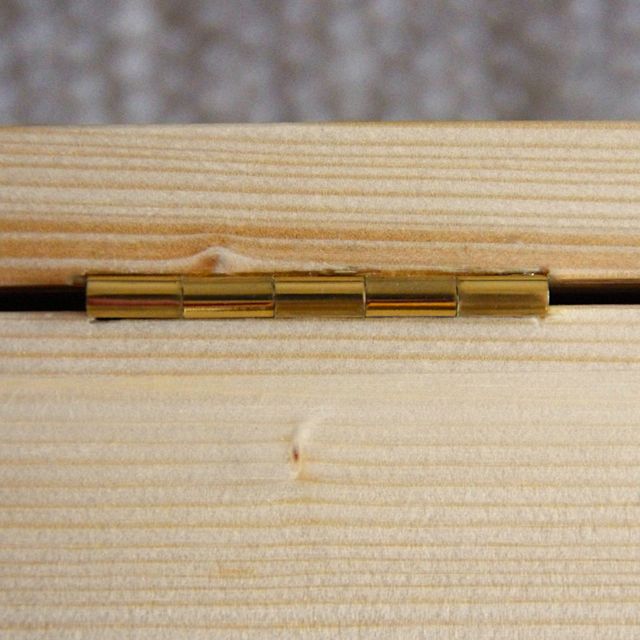
I used brass elements for the door knob and hinges.
I chiseled a tiny little cavity (is that the right word for it?) into the door and the body in order to have an even gap all around the door despite the thickness of the hinges’ material.
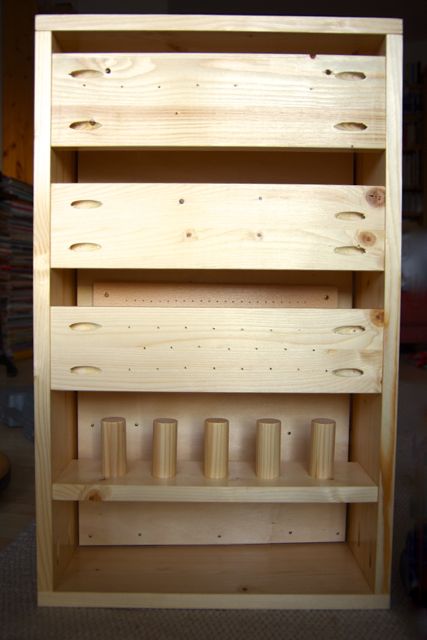
This is the cabinet from behind. Pocket holes everywhere – I love pocket holes! Putting together the body and door has been the fastest part of the entire project. Drilling is easy with the Kreg Jig, and screwing as well. You can see the bottom shelf with the mounts for bracelets and watches. The other boards have hooks from the other side to hang stuff on them. All their pocket holes are on the backside, of course, to keep them hidden from view.
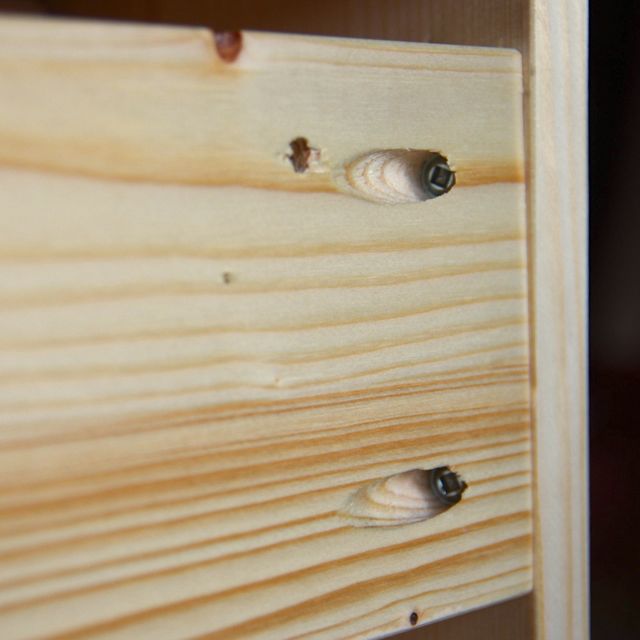
Here is a pocket hole detail – the screw sits within the predrilled hole and cuts its way through to the side of the body. If the pieces are sawed at correct measure and at a 90 degree angle on all sides, the joint will fit perfectly.
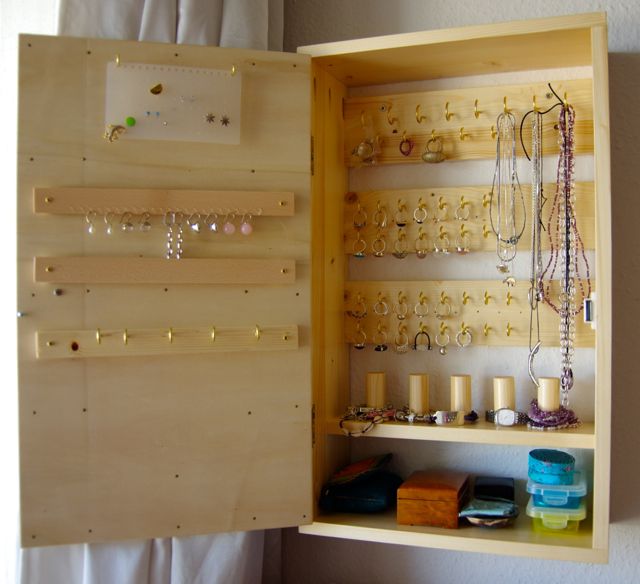
And, finally, ta-daaaa!!! This is it from the inside, already having inhabitants moved in. As I am a ring addict (I love to buy them and I make them myself, too), there is lot’s of space dedicated to hold rings. There are even some “standby” holes drilled to screw in more hooks should the space not be sufficient anymore one day.
The entire project was inspired by Jamie & Jay Bates who got the idea from Shanty-2-Chic who created the original design. I love both Jamie and Jay and the two Texas super women behind Shanty 2 Chic.
(And, b.t.w., after finishing this project, I immediately de-cluttered my home by giving the old, ugly, anyway-too-small jewelry box away for good.)
April 4, 2015 at 12:52 am
WELL done!